Noodle’s Gripping Toes

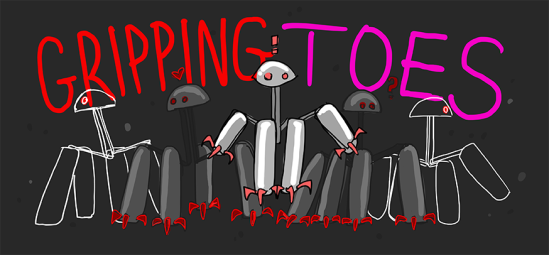
noodleTOES

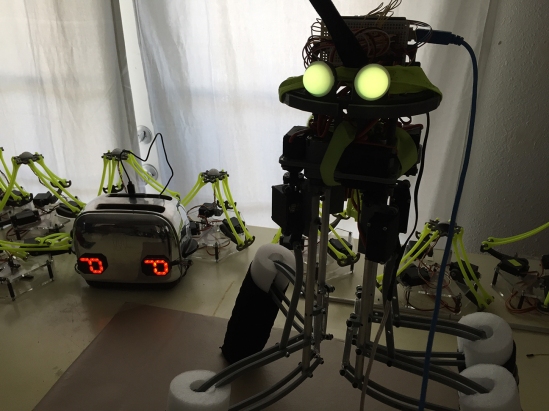
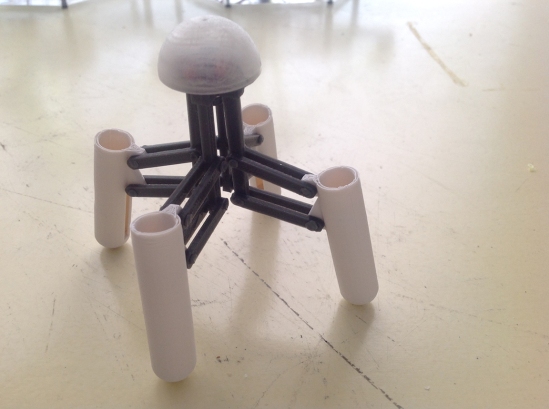
For the past year, the four tawny stalks that NoodleFeet balances upon have remained common pool floaties, 2.5 inches in diameter, hollow, providing nothing more than the obvious support needed to function as legs… but Noodle longs for something greater.

GRIPPING TOES

When Noodle feels threatened, there is little he can do to defend himself. He can beep and perhaps canter away at a slow speed… but he is passive and therefore vulnerable. He isn’t equipped to handle the harrowing task of world domination::cough:: I mean, daily life. To fix this, I decided to add another layer of complexity to Noodle’s most important characteristic: RETRACTABLE GRIPPING TOES for his feet.

A while back, I came across a video of a rock drilling probe concept by JPL. This neat claw attaches itself to a surface by splaying out a hundred or so mini grappling hooks in all directions, which catch on the rock and help anchor the central cylindrical drill in place. I saw this and thought to myself… Noodle needs four of these, as shoes.

Like a good mother, I started brainstorming how to create said shoes. Originally I designed long claw-like toes that rotated out and back, sort of like switch-blades:

Screen Shot 2015-11-11 at 1.50.32 PM

IMG_6632

They fit into Noodle’s original 2.5″ diameter noodle material, and even added stability… but there wasn’t enough area to actually install any motors to actuate things.

With a little bit of trial and error I rethought the whole design and came up with a solution that made use of 3D printed plastic’s flexibility. This new concept worked more like a cat’s retractable claw, and was similar to the drill from the video that had inspired me.

toe1

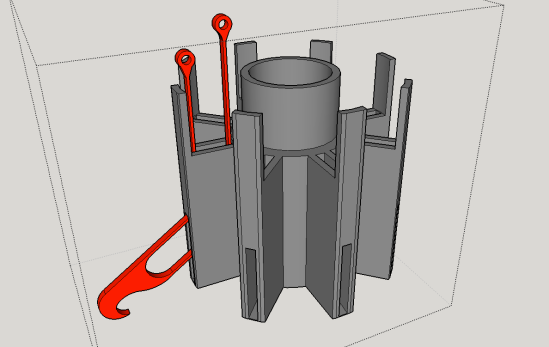
Each individual toe (in red) would be forced through a curved internal channel and out the side via two thin bendable “tendons”:
Screen Shot 2015-11-12 at 2.23.46 PM

How The “Tendons” Work

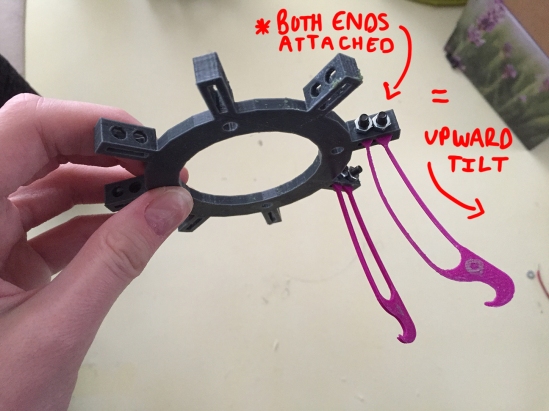
An individual toe has two strands of tendon attached to the back. When the tendons are pulled in opposite directions, it causes the toe to torque upwards or downwards.

Why Do the Toes Need to Tilt Back and Forth?

If the toe goes straight back into the sheath the way it came out, it won’t unhook from whatever its currently gripping. Also, the tip of the toe will likely snag on the edge of the sheath on its way back in. To properly “detach”, the toe should arc upwards slightly as it retracts.

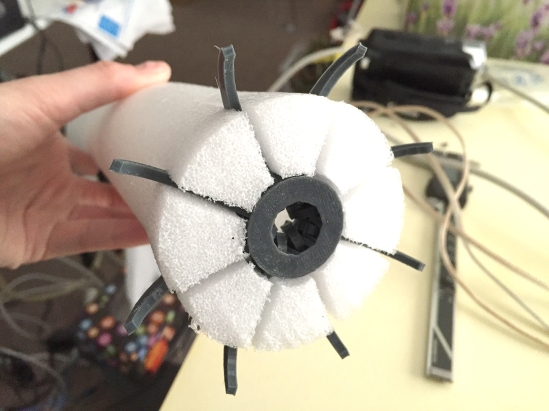
My first prototypes were designed to fit inside the 2.5” diameter noodle material. I was able to make it work, but it didn’t leave much room for the other future functions of his feet (his tongue):

IMG_6656

IMG_6831

In the end I really needed more space to fit moving parts and hardware. Luckily I have a noodle fairy living with me (Mark) who harvested a larger piece of noodle stock from a pile in his garage. It is 4” in diameter and offers me much more room to play around with! Plus, fatter feet will give Noodle more stability!

IMG_6803

4″ PRO-TOE-TYPE 1.0

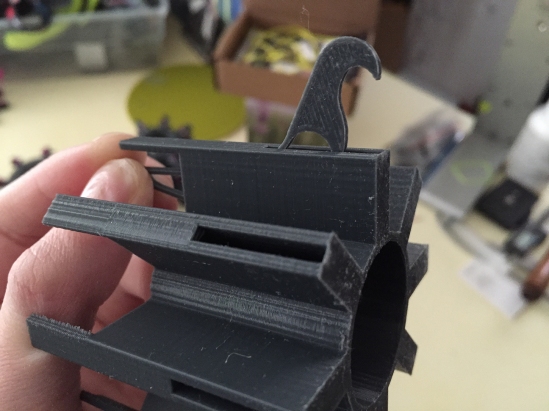
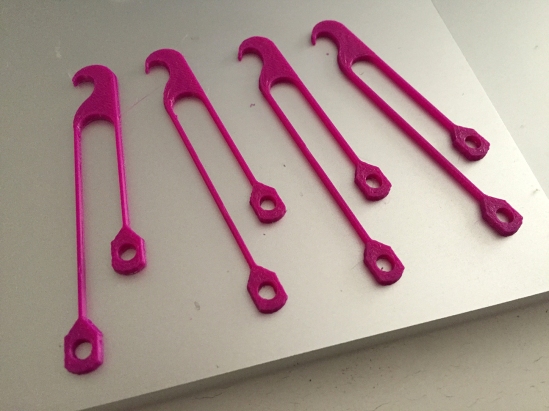
I tweaked my design for the new 4” material and printed my first prototype with a set of eight twinkling magenta toes (I haven’t ordered red filament yet).

IMG_6812

The reason for the tendons being slightly different in length is so that when they are fixed next to one another, it creates the needed outward/upward tilt:

IMG_6840

(so, this is what a toe flower looks like):

IMG_6805

I originally planned to connect both tendons of each toe to a common ring piece (above). When the ring is pushed downward towards the sheath, it would force all of the toes through their channels and outward at the same time. I also added a spring and guide rod (a long screw) below the ring to push it up again once downward force is removed:

The first complete 4″ prototype worked more or less… It certainly passed the “carpet snagging” test:

I learned right away that I couldn’t actually connect both tendons to the same ring and run it through the inside of the sheath without it binding (which now seems pretty obvious). The only way I could get the above demonstration to work was if I left the longer set of tendons sticking out freely, attached to nothing… so that the toe has no preset angle bias as it attempts to travel through the channel:

IMG_6837

However, in order to make it work at this point, all the little purple pieces sticking out had to be pressed down together at the same time first, or else everything would bind up and destroy itself.

4″ PRO-TOE-TYPE 2.0

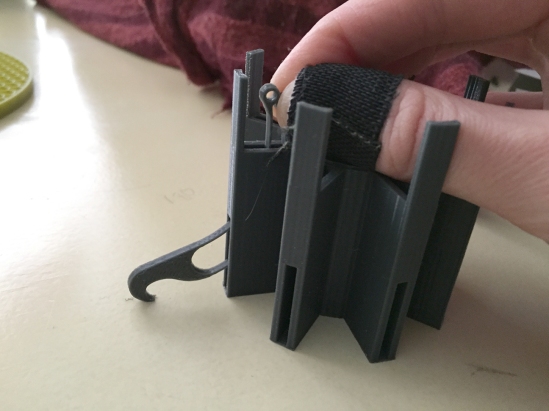
Each tendon should be attached to its own independent ring…

…so that when the ring attached to the inner set of tendons is pressed downward, it causes the toes to tilt upward first as they begin to move down through the channels. Then the top ring hits the second ring below it which the outer tendons are attached to, and then the two travel together pushing the toes outward the rest of the way while maintaining the slight upward torque. This allows the toes to torque gradually as they travel through the channels, without binding up:

IMG_6818

This second prototype (above) is more or less final. I’m going to fine tune it from here, but something very much like this will end up as Noodle’s toe-feet.

The greatest part about this design is that I have nearly 36mm wide of space in the middle to fit his secondary foot function! … ( ? ) … Which is tasting if you didn’t know!

Stay tuned for my next post on the development of Noodle’s TASTING FEET; small silicon wedges that will salivate and lick:

Screen Shot 2015-12-06 at 12.19.14 PM

As I typed that it just occurred to me that I’m pretty much making a tube that can grip onto something while licking and drooling on it. -heh- He’ll have four of these devices. Noodle will be feared by other robots his age.

The only downside to these new complex feet is that I’ll likely have to learn to knit him a pair of custom socks for Christmas. (and I think I actually will) ❤

Read about my past progress on NoodleFeet on my website!

More to come soon!

A Creeper with a Beeper

IMG_6413

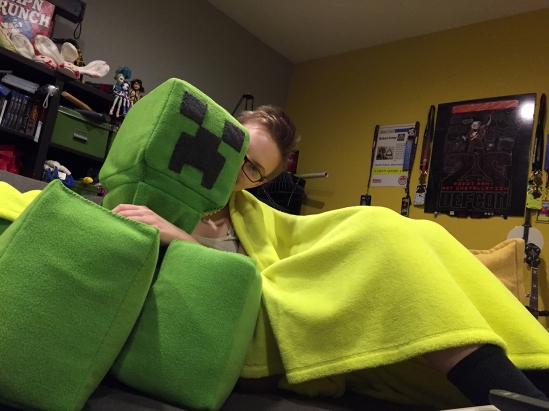
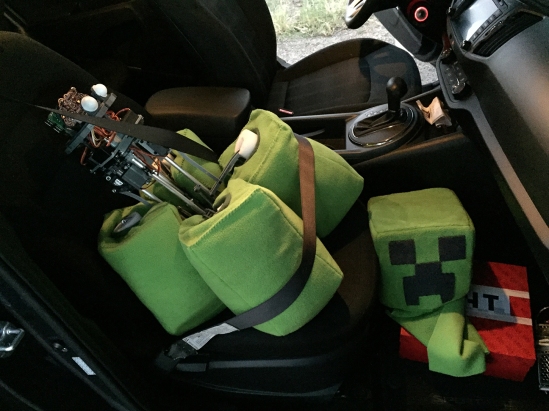
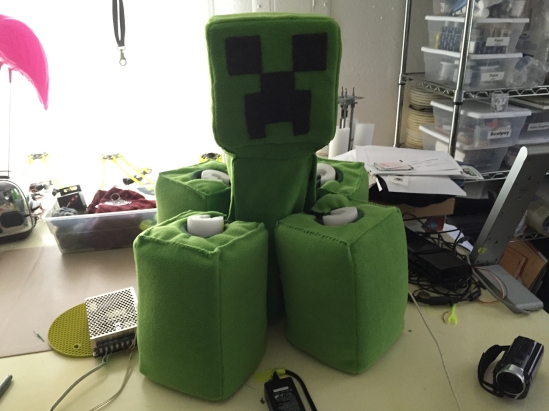
There comes a time when it is more important to pour hours into your offspring’s Halloween costume than your own. This was the year that happened to me. As it was Noodle’s first Halloween, I decided to make him into a huggable creeper from Minecraft… so he could steal all the hearts with his cuddly adorableness.

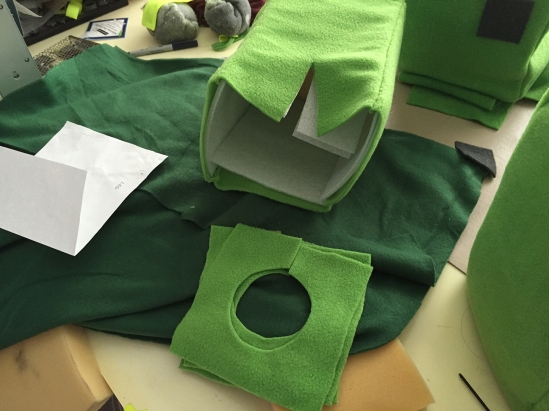
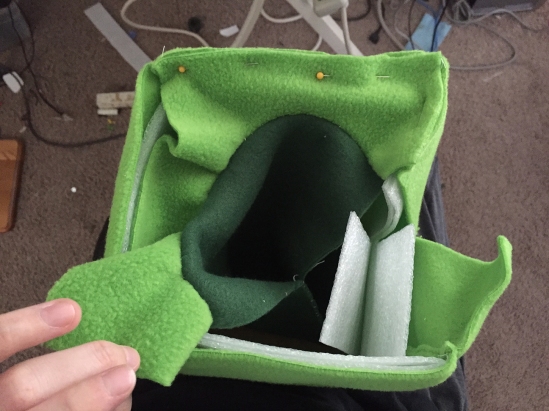
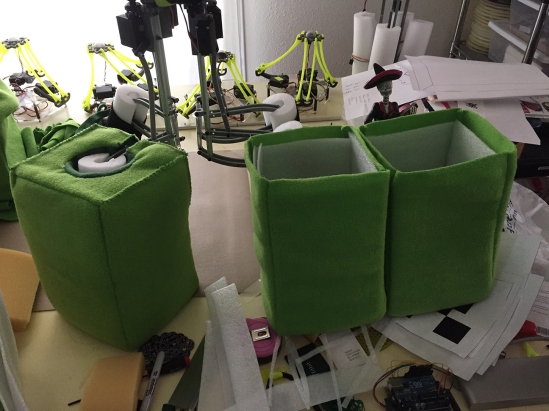
I spent over a week hand sewing this little number together from soft fluffy fleece. It was surpassingly time-consuming to make each of the four cubic creeper feet booties that slipped snuggly over Noodle’s noodles. I designed them with clearance slots so they wouldn’t obstruct his ability to move. Noodle was the happiest… 😉

IMG_6375

IMG_6377

IMG_6367

I took him out a little during the weekend to make sure he got proper exposure… but wasn’t quite ready to actually let him try to trick-or-treat on the street.

IMG_6438

His creeper feet were so wide that he was more or less safe from falling over, so I coded some quick creeper behaviors to animate him a bit. I wasn’t quite able to figure out the appropriate “creeper walk” motion, but I’ve decided to take another stab at it soon. Until then, you can see him wiggle here:

Throughout the month of October I had been preparing for the HackaDay SuperCon. I gave my first talk on designing kinetic things as characters. Noodle was my primary example, so I made sure to finish up a few of his functional quirks in time for the conference. One such feature was his beeper paired with the accelerometer sensor.

beeper + accelerometer = panic voice

This enables the behavior of calling out whenever noodle accidentally tips over. Kinda like a real baby! Every time you pick Noodle up and tip him in a direction past a certain degree, he beeps to indicate so:

I hope he doesn’t ever complain about his childhood sucking.


The Walking Noodle

IMG_6114

NoodleFeet finally took his first few wobbly steps a couple of weeks ago. I’m so happy to have finally wrapped my head around a walk cycle that works in spite of his obvious physical limitations; wobbly joints, weak motors, and top-heaviness.

Now that this milestone has been reached, he can no longer remain in his weak proto-form any longer. Noodle must grow to become the powerful little leg-hugging monster he was always destined to be. PHASE 2 BEGINS!!!

The most important upgrade I needed to make was to his brain. A custom PCB would replace the current Arduino and allow Noodle all of the other behaviors and abilities he would like to have, such as beeping, balancing, and of course… actually seeing!

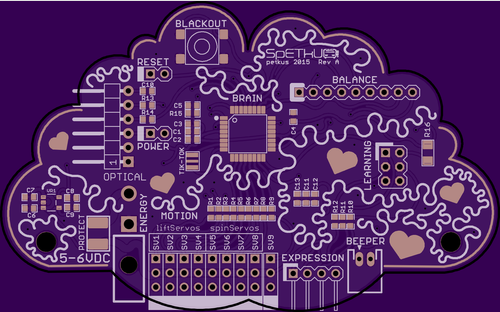
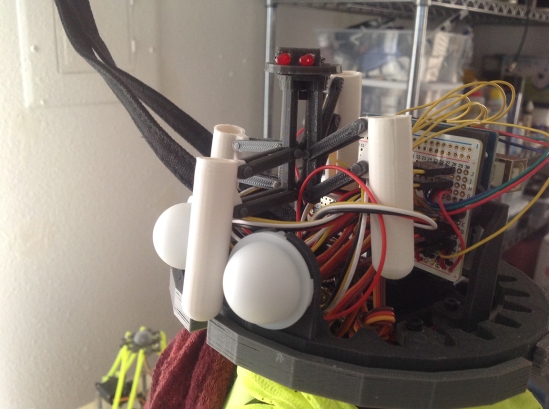
With help, I tossed together a fully loaded board sporting an ATMEGA328 that houses the potential for all of those systems, and will also connect to a Raspberry Pi when I’m ready to dip my toes in OpenCV (Noodle’s ability to see and comprehend what he sees). Not only is this new Noodle Brain far more capable… it also looks sufficiently Noodle-some too. I completely embraced the “curve” trace tool. (It’s ramen-esque! – heh, get it?):

Screen Shot 2015-10-02 at 12.48.01 PM

Also about two weeks ago, I applied to give a talk at HackaDay’s first SuperConference in San Francisco. I proposed to tell all about my process designing and building mechanical forms that are inspired by character illustrations… (with Noodle being my primary example)! I’m excited to say that I was accepted. I have a new thing to look forward to this fall; it will be my first talk ever 😉

CRXXAjfU8AAE8e3.jpg-large

Any how, all the more reason to do some more upgrades to my Noodle child! Upon making my travel arrangements for San Fran, I also ordered a full set of high torque metal gear servos to replace the so-so resin ones that he’s made do with so far. This ultimately involved completely dismantling Noodle. Knowing he wouldn’t like this, I made sure to take out his old brain first:

IMG_6381

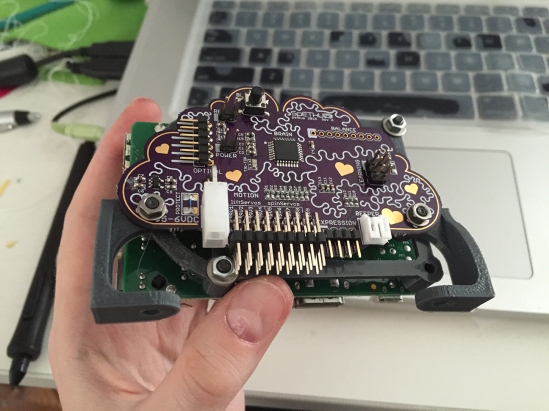
When my fabs arrived, I quickly soldered one up and installed it this week along with the Raspberry Pi (attached to the back of the brain):

IMG_6305

Noodle as he stands now, has the power to punch through walls with his feet, the ability to balance, beep, and eventually see- once the raspberry pi camera module arrives from SparkFun. Here’s a video of the first wave of upgrades taking place:

I can now return to honing his walk cycle… so that he’ll be a bit more mobile for the SuperCon next month. It’s quite possible I’ll still be replacing some of his plastic parts to remove more of his new-born wobble… but we’ll see.

( ! ) TEASER ( ! ) My next post will cover preparation for Noodle’s first Halloween ( ! ) TEASER ( ! )

IMG_6407

noodleFeet : Animating the Noodle

I’ve spent the last week learning After Effects. For someone who uses Illustrator on a daily basis, this feels a lot like discovering the magic hat from Fantasia. Among other things, AE allows you to turn a vector based 2D image into a fully rigged character for animation… and it’s even easier to do than you’d think.

I had the idea a while ago to make a series of videos about Noodle and his adventures to Mars… The original plan was that they would be stop-motion shorts, made with a tiny 3D printed version of noodle as the puppet. There is no better terrain to fake as the surface of Mars than our very own desert outskirts… but alas, it is HOT out these days. Even if I could handle the relentless sun (which I can’t because I am WHITE), the PLA that the tiny noodle is made out of cannot. So much for the stop-motion thing.

IMG_2094

For scale (his eyes light up and his feet can hold AAA batteries to power the LEDs):

IMG_2088

I still wanted to make the short videos, so I started thinking back to all the annoyingly complex animation software (like Flash) I’ve used in the past and decided to give AE another go. Since the last time I made an animation using After Effects, they added the puppet pinning feature. It allows you to animate a single layer image by creating a fancy deformation map inside of it that can bend and warp. This means, instead of needing to connect pieces on separate layers together through a process of parenting and careful organization of anchor points… you can just rig one happy image with some bones, and you’re ready to pose your character with cool jello-like properties.

This happened to work SWELL with noodleFeet, as he is essentially a creature of wobble wiggle nature himself. After a long day spent watching tutorials, I got off and running and managed to make my first animation last week.

I still intend to produce a few more of these, but we’ll see how far my patience goes. Though it’s easy to animate, it’s still time-consuming to do it right. Once I attempt to introduce physics into the mix, I may hit a wall… because I’m too cheap to buy one of the fancy addons you need in order to generate the effects of gravity. Bastards.

The best part about having animated noodle walking is that it actually may have helped me understand how to program real-life noodle to walk better. So really, this turned into practical R & D. Ha!

Enjoy getting to know my baby a little better. He is the feet.

noodleFeet : Looks Like a Noodle

HEAD : I can’t find a damn semi-transparent mixing bowl to appropriate as Noodle’s noggin. So, I went with a plastic bowl I bought a while back because it was Robot Army gray and yellow. The size isn’t right, but tilted at an angle with his eyes poking out it looks a lot like a helmet… and I’m okay with that.

SHOULDERS : I went to the store with Mark yesterday and searched through all of the collars in the pet isle to find a replacement for his old harness which no longer fits around his new planetary gear assembly. There were many small kitty-sized bands with big jingly bells… but not a single one was in neon yellow. So I didn’t bother getting any.

In leu, I smashed noodle’s old harness back onto his gear box so that if needed I can still hook him into the leash hanging from the ceiling above the work table. It lacks a proper bell… but fashion is second to safety.

KNEES : I think noodle needs socks.

TOES : He needs socks because I still haven’t been able to locate some of those stupid squishy stress balls which I plan to halve and mount to the bottom of each of noodle’s feet. These should help give him some traction as he attempts to walk. Someone pointed out that the foam material of the noodle was just sliding on the smooth surface of our table which was why he didn’t get very far during his first test run…er- walk.

Any how… the socks will keep the bottoms of his noodles clean until they’re capped with said squishy foam balls… Because tomorrow I’m taking noodle on his first ever outing into the big wide world.

He’s far enough along to show off at this point, walking or not. Speaking of walking… here’s some footage of him taking his first steps:

noodleFeet : All Wired and Ready

When your baby is learning to walk, you make sure its near soft things and away from stairs so that when the inevitable fall occurs, they don’t collapse into pieces. When your baby is a robot learning to walk, bungie chords and harnesses are also needed. And in the case with noodle, who is delicate and wobbly like a skittish baby fawn, I am sparing no precaution!

The noodle Harness

IMG_1487

Robots get rigging. Mark took the time this weekend and installed a guide wire on the ceiling over our work table. A “leash” hangs down from this wire and clips on to noodle’s smashing neon-yellow harness which wraps around all four of his legs. If he loses his balance, he won’t have very far to fall before the leash pulls tight and catches him.

Calibration!

IMG_1485

Before assembling noodle for his big day, I had to calibrate all of the servo motors to 90º. Only then could I screw the gears to the motor shafts, as well as connect the pulley bits from the secondary servo motors on each leg to the bendy bits.

In the end, once all of the final parts were attached to one another,  I was pleased with how solidly he stands on his own. Hopefully I can figure out the right way to distribute balance so that he can lift up his feet and walk.

Wiring up the Bread

IMG_1482

Lastly, this afternoon I taped an Arduino down to the end of a breadboard and fashioned some male headers so that the servo motors could easily plug-in and tether to their appropriate pins. The breadboard itself is taped directly to the leash so that it will move with noodle as he walks… or falls.

When is he walking?

So, he’s poised and ready. The big moment will either come tonight some time or tomorrow after Mark is home from work for the weekend. Either way, I’ll be sure to take LOTS of footage of my wobbly child as he navigates across the table for the first time. =O

Wish us luck!

noodleFeet : Goes Metal

I’ve relied on 3D printing for so many of my prototypes lately, and have finally come to a point where plastic won’t cut it any longer. I require metal, in this case aluminum. The likes of which I ordered from McMaster-Carr and received in the mail last week. I literally spent the majority of the weekend meditating over how to measure my cuts and holes… as for the first time in a long time, their accuracy and placement was entirely up to me and my calipers, not some Cartesian goo plotter as I’m so spoiled by…

While everyone was downing beer and watching the Stuperbowl, I was in the garage with Mark playing with his father’s ancient drill press. He eyeballed one axis, I checked it against the other, and we were able to punch the 24 holes needed on the four pieces of aluminum tubing which would soon be noodleFeet’s strong new legs.

IMG_1445

As you can see, I printed out little strips of paper with lines where holes needed to be drilled. It only occurred to us immediately after we finished how much easier this would have been if we had 3D printed a jig for drilling the holes instead… So alas, 3D printing could have potentially saved the day. Thoughtful or not… we did a pretty good job.

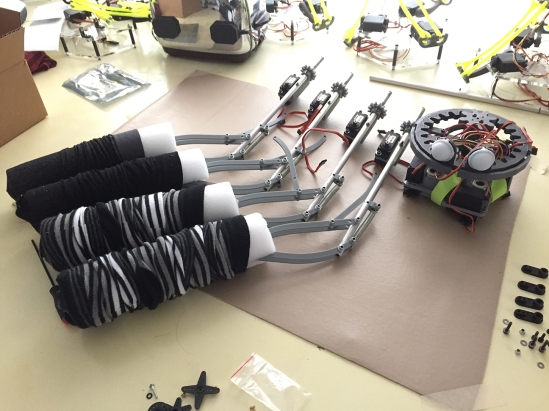
Once the aluminum femur was assembled, I realized I was going to need stronger springs. These flour legs are going to support eight motors, a board, and eyeballs; a decent amount of weight:

IMG_1448

The calf bit is essentially a bone buried within the noodle material. However, with my last prototype, the bone kept sliding out the clearance slot I cut in the noodle. So to remedy this I made these little braces that look like pac-man heads… which keep the bone centered within the tube and prevent it from popping out where it isn’t suppose to:

IMG_1456

The rare and beautiful white noodle was harvested by Mark from the great noodle beast itself. I cut the pieces to length with a Japanese saw and carved the appropriate clearance slots so that the legs can fold in on themselves like they should:

IMG_1460

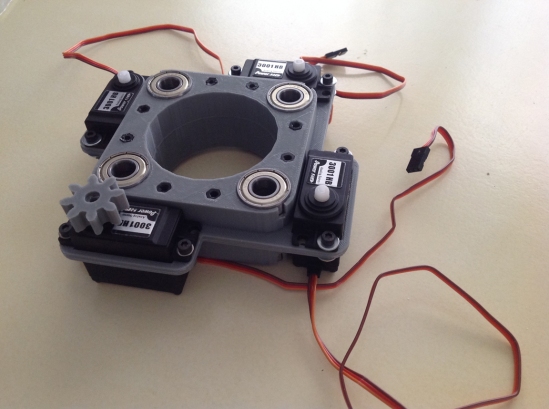
The new servo and leg bracket is THICK. It is complete with roller bearings spaced a decent amount apart vertically to keep the intersecting pipe from wobbling around (as with my first prototype):

IMG_1454

The eight roller bearings hold the pipes perfectly parallel to one another and allow them to turn nice and smoothly. I also added stronger springs to tension the legs outward, so the new prototype is a little monster. Although… he looks sort of helpless up-side-down on my bench right now:

IMG_1463

At this point, Feet is nothing but a pile of feet. He needs eyes, and that is exactly what I’m going to do next… and maybe a brain. Over this weekend I’ll likely hook an Arduino up to his servos and figure out a walking pattern too.

I honestly have no idea what it’ll look like when he walks, but I’m hoping due to the springs counterbalancing his weight that he’ll have a little bit of a bounce. That’d be cute.

I also don’t know if he’ll be able to balance himself when he walks. Once summer happens and the noodle is less rare, I will go harvest some 4″ stock (in neon yellow) from Walmart and cut my prototype some new fat feet. That way he makes more contact with the ground and is less like to fall. Like training feet.

IMG_1475

Hopefully by my next update he’ll be moving some… like a robot aught to. Cheers!

noodleFeet : Proof of Concept

Last week I started building a new robot who I’m calling noodleFeet! He is essentially a spider-type walker who will locate nearby legs, approach and then lean on them. In addition to having that specific purpose, he needs to look a particular way. I’ve been drawing him in the margin of my notes for weeks now, so he’s become something of a character to me:

noodle2

In order to make a robot that does these things, I need to design the mechanism itself and how it will be attached to the motors driving the motion (challenging and fun). At the same time I need to learn about Open CV and figure out how to make a computer recognize all the different shapes that legs come in. This will involve a camera and some coding (hard and not fun). With these two elements combined, I’ll eventually end up with a leg hugger…… or leaner. I’ll talk about the details of those steps when I get to them.

To get started, my challenge for the weekend was to solve how to make the legs of the robot itself. I wanted to come up with a reverse knee-joint capable of folding into a single-stick. This took about three of four revisions to get right, at which point I went on to 3D print four copies for the proof of concept.

IMG_1420

The proof of concept is nothing more than a rough servo bracket that holds all of the motors in place at the point where the four legs attach to them. With these parts alone I was able to construct something that looks surprisingly already very much like the end product I’m aiming to create. It still isn’t a working prototype however. For this, my concerns were mainly measurement and proportion:

noodle

I’ve gotten away with using 3D printed parts on many of my projects, but for this one plastic isn’t going to cut it. Even though the design is mechanically sound (I believe) and I could have wired some servo motors up to see some motion, the flimsy plastic legs don’t seem like they’d be able to support the combined weight of the motors… so I didn’t. Because of that, the next step is to replace the crucial parts that support the most weight with aluminum pieces. So I’ve gone ahead and ordered some hollow pipe and bearings for a more sturdy, motion-ready second prototype. In fact… the materials arrived today, so it’s a good thing I got documenting this out of the way!

Hopefully with my next post I’ll have video of noodleFeet making his first steps… or wiggles. You can see him in this illustration I recently drew to the right of our car:

wtfWestCoastSmall